Mag Drill 101
19th Apr 2023
Magnetic Drills 101
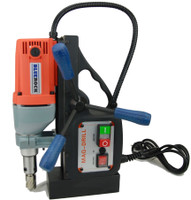
An electromagnetic drill, also known as a mag drill or magnetic drill, is a powerful tool that can make drilling holes in steel and other metals much easier and more efficient. However, it can also be quite intimidating to use if you have never used one before. In this blog post, we will go over the basics of how to use an electromagnetic drill so that you can feel confident and safe when using this powerful tool.
Step 1: Choose the Right Size and Type of Drill Bit
When using an electromagnetic drill, it's important to select the appropriate cutting tool based on the size of the hole you need to make. For holes larger than 7/16", annular cutters with centering pins are typically used. These cutters will use a tool holder called a Weldon Shank. These annular cutters are designed to make clean, accurate holes in steel. The centering pins help to ensure that the cutter is centered when beginning a hole as well as for ejecting the cut steel “slug” after the hole has been drilled.
Make sure to select a drill bit that is suitable for the material you are drilling and that is the correct size for the hole you need to make. Also, make sure that the drill bit is securely inserted into the drill chuck or Weldon Shank before using the machine.
For holes smaller than 7/16", standard twist drill bits can be used if your magnetic drill has an adapter for using a standard twist chuck. These bits are commonly available and can be used for a variety of drilling applications. However, it's important to select the appropriate bit for the material you are drilling. Some high carbon or harder steel types might need a TCT (Tungsten Carbide Tipped) type of cutter which can be found in both standard twist drill bits as well as annular cutters. Note that if using a mini-mag drill (like our BLUEROCK TYP-28A), you probably won’t have enough room to use a drill chuck. Most mini-mag drills are for annular cutter use only.
Step 2: Set Up the Magnetic Base
Next, you will need to set up the magnetic base of the drill. This is the part of the tool that attaches to the surface you will be drilling. Mag drills are only to be used on ferrous steel. They will not adhere to non-ferrous metals ie; stainless steel, cast metal, etc. Mag drills are not to be used in thin gauge metals either. These are for use on a minimum of ¼” standard steel, but note that maximum adhesion will only be attained on 1” depth steel. So the thinner you go, the less adhesion you have.
Make sure that the surface is flat, clean and free of any debris before attaching the magnetic base. If there is a coating on the steel of any kind, that will adversely affect adhesion. We recommend removing any coatings to get full adhesion. You also need the entire magnetic base to be on the steel. Partial placement of the base on steel will result in suboptimal adhesion and an unsafe situation.
Once you have engaged the electromagnetic base, make sure that it is securely in place and will not move during the drilling process. For smaller drills, it is normal to be able to push the drill off its adhesion from the side. You should not however be able to lift the drill from the top directly off its adhesion if pulling straight up.
Make sure to use the safety chain or safety strap that comes with your drill to ensure the drill does not fall in a power outage or if magnetic adhesion is compromised.
Step 3: Turn on the Drill
After the drill bit and magnetic base are securely in place, turn on the drill. You will hear a humming sound as the motor engages. The drill bit will then begin to spin at a high speed.
Step 4: Begin Drilling
Once the drill bit is spinning, you can begin drilling into the material. Use a slow and steady pressure to guide the drill into the material and be careful not to apply too much force especially as you start a hole. Let the drill do the work, and do not force it through the material.
Step 5: Adjust the Speed and Depth of the Drill
If your drill has a variable speed/gear function (Like our BLUEROCK BRM-60 or TYP-75), or depending on the material you are drilling, you may find it advantageous to adjust the speed. Generally speaking, if you drill holes larger than 1-1/2” in diameter, slower speeds will increase bit life and decrease torque on the drill. For 7/16” to 1-1/2” generally a single speed drill (like our BLUEROCK BRM-35A) will suffice.
Step 6: Turn off the Drill and Clean Up
Once you have finished drilling your holes, turn off the drill and clean up the area. Remove the magnetic base from the surface and clean any debris from the drill bit and chuck. Store the drill in a safe and secure location until you need it again.
Conclusion:
Using an electromagnetic drill can be a bit intimidating, but with these simple steps, you can quickly and easily get the hang of it. Always make sure to choose the right size and type of drill bit for your project and be careful not to apply too much force when drilling. This quick 101 guide does not supersede your machines operational manual. Always make sure to follow the manufacturer's instructions and take appropriate safety precautions when using an electromagnetic drill. This tool can make drilling holes in metal much easier and more efficient, but it should be used with caution and respect. With practice and patience, you can become a pro at using this powerful tool. Let us know if you have any additional questions or concerns.
BLUEROCK Tools

